Creating Open Graph Images in Django for Improved Social Media Sharing
2025-01-11

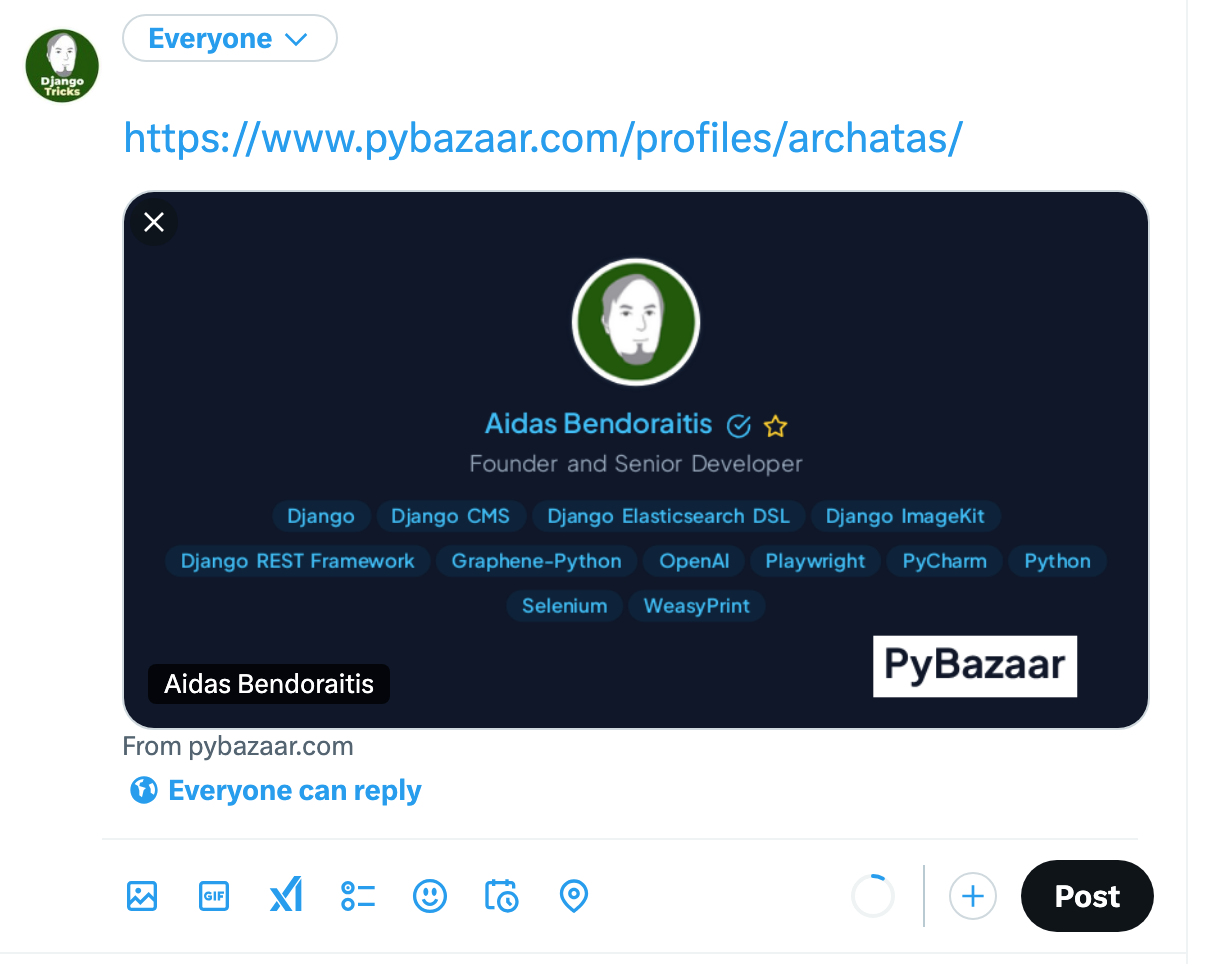
Although social media algorithms usually discourage posting links so that users stay as long as possible on the network, people often still post links below an introductory post as a comment or reply. Normal links to websites on social media look pretty dull unless you add open-graph images representing that link.
In this article, I will show you how you can generate open-graph images for a Django website using web rendering from HTML and CSS. I rely on this technique to generate Open Graph previews for links from DjangoTricks, 1st things 1st, and PyBazaar.
What is an Open Graph?
Facebook created the Open Graph protocol to allow websites to provide rich representation of any web page. Although it has specifics for websites, articles, profiles, music, and video, the common use case is to have a preview image with a title for social feeds. Open Graph previews work with most well-known social networks, including Facebook, Threads, LinkedIn, Mastodon, and Blue Sky. Open Graph tags are HTML meta tags that you put in the HEAD section, e.g.:
<meta property="og:type" content="website" />
<meta property="og:url" content="{{ WEBSITE_URL }}{{ request.path }}" />
<meta property="og:title" content="{{ profile.user.get_full_name }}" />
{% if profile.open_graph_image %}
    <meta property="og:image" content="{{ profile.open_graph_image.url }}?t={{ profile.modified|date:'U' }}" />
{% endif %}
<meta property="og:description" content="{{ profile.summary }}" />
<meta property="og:site_name" content="PyBazaar" />
<meta property="og:locale" content="en_US" />
X (formerly known as Twitter) also has basic support for Open Graph, but it is better to add Twitter-Card-specific meta tags to make the preview more prominent. Here's an example:
<meta name="twitter:card" content="summary_large_image">
<meta name="twitter:url" content="{{ WEBSITE_URL }}{{ request.path }}">
<meta name="twitter:title" content="{{ profile.user.get_full_name }}">
<meta name="twitter:description" content="{{ profile.summary }}">
{% if profile.open_graph_image %}
    <meta name="twitter:image" content="{{ profile.open_graph_image.url }}?t={{ profile.modified|date:'U' }}">
{% endif %}

Use both Open Graph and Twitter Card meta tags for cross-platform support.
The dimensions of the preview image
The Open Graph Preview image dimensions will vary across different social networks. Many sources online recommend using 1200 x 630 px, but I have also successfully used smaller dimensions.
If the image is too big, the social network might take longer to process it for the preview, which slows down the link publishing.
On the other hand, if it's too small, its text might be too blurry.
Using the browser testing tools for the screenshots
I have used Playwright and Selenium to generate preview images in a background task. Since Playwright has a built-in mechanism to download browser binaries and is much more advanced in testing capabilities, it is also my first choice for screenshots.
You can install Playwright with:
(venv)$ pip install playwright
(venv)$ playwright install
Ensuring to have the necessary settings
To show the proof of concept, you would need WEBSITE_URL and Open Graph Image dimensions in your settings:
WEBSITE_URL = "https://www.pybazaar.com"

OPEN_GRAPH_IMAGE_WIDTH = 800
OPEN_GRAPH_IMAGE_HEIGHT = 418
Passing the WEBSITE_URL to the templates
It's easiest to pass the WEBSITE_URL and other settings to all the templates by having a custom context processor:
def website_settings(request):
    from django.conf import settings

    return {
        "WEBSITE_URL": settings.WEBSITE_URL,
    }
Set it in the settings as follows:
TEMPLATES = [
    {
        "BACKEND": "django.template.backends.django.DjangoTemplates",
        "DIRS": [os.path.join(BASE_DIR, "templates")],
        "APP_DIRS": True,
        "OPTIONS": {
            "context_processors": [
                "django.template.context_processors.debug",
                "django.template.context_processors.request",
                "django.contrib.auth.context_processors.auth",
                "django.contrib.messages.context_processors.messages",
                "pybazaar.apps.core.context_processors.website_settings",
            ],
        },
    },
]
Preparing the models
Each model that should have an Open Graph preview image should get an image field open_graph_image:
import os
from django.db import models
from django.utils import timezone


def upload_images_to(instance, filename):
    now = timezone.now()
    filename_base, filename_ext = os.path.splitext(filename)
    return "profiles/{user_id}/{filename}{ext}".format(
        user_id=instance.user.pk,
        filename=now.strftime("%Y%m%d%H%M%S"),
        ext=filename_ext.lower(),
    )

class Profile(models.Model):
    user = models.OneToOneField(
        "accounts.User", verbose_name="User", on_delete=models.CASCADE
    )
    open_graph_image = models.ImageField(
        "Open-graph image", upload_to=upload_images_to, blank=True
    )

    def generate_open_graph_image(self):
        from .tasks import generate_profile_open_graph_image

        if self.open_graph_image:
            self.open_graph_image.delete()
        generate_profile_open_graph_image(profile_id=self.pk)
Creating a Django view for the Open Graph preview
To define the preview layout, we'll create a custom HTML view:
from django.views.decorators.cache import never_cache
from django.shortcuts import render

@never_cache
def profile_open_graph_preview(request, username):
    profile = get_object_or_404(Profile, user__username=username)
    context = {
        "profile": profile,
    }
    return render(request, "profiles/profile_open_graph_preview.html", context)
The Django view used for the Open Graph preview image can use CSS frameworks, such as TailwindCSS, custom fonts, and Javascript enhancements for layout. This allows you to have consistent typography and styling with the website.
Plugging the view into the URLs
The URL rule for the view is pretty straightforward:
from django.urls import path
from . import views

app_name = "profiles"

urlpatterns = [
    #...
    path(
        "<str:username>/_open-graph-preview/",
        views.profile_open_graph_preview,
        name="profile_open_graph_preview",
    ),
]
Creating a background task to make screenshots
I use Huey for background tasks. The background task that generates screenshots looks like this (Celery task would be analogical):
from huey.contrib.djhuey import db_task


@db_task()
def generate_profile_open_graph_image(profile_id):
    import os
    from playwright.sync_api import sync_playwright
    from PIL import Image
    from django.conf import settings
    from django.core.files.base import ContentFile
    from django.core.files.storage import default_storage
    from django.urls import reverse
    from io import BytesIO
    from .models import Profile

    os.environ["DJANGO_ALLOW_ASYNC_UNSAFE"] = "true"  # for Playwright
    profile = Profile.objects.get(pk=profile_id)

    with sync_playwright() as p:
        browser = p.chromium.launch(headless=True)
        context = browser.new_context(
            viewport={
                "width": settings.OPEN_GRAPH_IMAGE_WIDTH,  # Changed to target dimensions
                "height": settings.OPEN_GRAPH_IMAGE_HEIGHT,
            },
            ignore_https_errors=True,
        )
        page = context.new_page()
        page.goto(
            settings.WEBSITE_URL
            + reverse(
                "profiles:profile_open_graph_preview",
                kwargs={"username": profile.user.username},
            )
        )
        page.wait_for_load_state("networkidle")
        screenshot_bytes = page.screenshot()
        browser.close()

    # Open and resize if needed
    image = Image.open(BytesIO(screenshot_bytes))
    if image.size != (settings.OPEN_GRAPH_IMAGE_WIDTH, settings.OPEN_GRAPH_IMAGE_HEIGHT):
        image.thumbnail(
            (settings.OPEN_GRAPH_IMAGE_WIDTH, settings.OPEN_GRAPH_IMAGE_HEIGHT),
            resample=Image.LANCZOS
        )

    # Save the image
    final_image_io = BytesIO()
    image.save(final_image_io, format="PNG")
    final_image_io.seek(0)

    rel_file_path = Profile._meta.get_field("open_graph_image").upload_to(
        profile, "profile.png"
    )
    default_storage.save(rel_file_path, ContentFile(final_image_io.getvalue()))
    Profile.objects.filter(pk=profile.pk).update(open_graph_image=rel_file_path)
Triggering the generation of the Open Graph preview image
Call the image generation method after saving an entry and its relations in a change view, administration view, or management commands:
profile.generate_open_graph_image()
The method runs the background task that launches Chromium, opens the Open Graph preview page, takes a screenshot, resizes it if necessary, and then saves the image. All that takes up to 15 seconds.
Final words
If you want the pages you share on social feeds to have a branded look and feel, generating Open Graph images with Playwright could be the right approach. You can use Playwright to make a screenshot of a web page in Chromium. The page can be styled with the same quality as your website. JavaScripts can be applied to highlight code syntax or resize the texts to fit into the given container, too.
Cover photo by Zeeshaan Shabbir
Also by me
Django Paddle Subscriptions app
For Django-based SaaS projects.
Django GDPR Cookie Consent app
For Django websites that use cookies.

